

Mistakes That Reduce Efficiency When Using Multiple Monitors
Multi-monitor setups are widely embraced by professionals, designers, and content creators to increase productivity and streamline digital workflows. However, simply adding more screens does not automatically improve efficiency. Poor arrangement, inconsistent usage habits, or unoptimized software can undermine the potential benefits of multiple displays. Many users underestimate the importance of organized workflows and compatible tools, resulting in confusion and time loss. Creative professionals who work with design and media applications can also face challenges managing multiple windows effectively. Tools like the phonto app help streamline content creation, but without proper monitor setup and workflow strategies, even the most powerful applications cannot fully enhance output. Avoiding common mistakes is essential for leveraging multi-screen advantages.
Poor Monitor Placement and Ergonomics

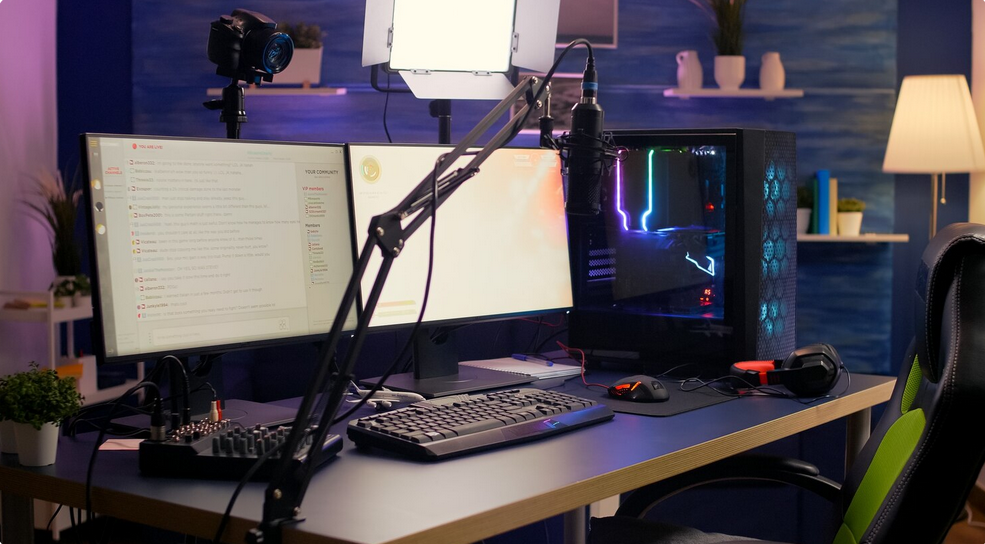
One of the most common errors is incorrect monitor placement. Screens that are too high, too low, or positioned at awkward angles can cause eye strain, neck pain, and discomfort over extended periods. Even slight misalignment between displays can lead to frequent head or body movement, reducing overall efficiency. For maximum productivity, monitors should be aligned at eye level with minimal tilt, and the primary display should be directly in front of the user. Additional screens should follow a natural arc to minimize physical effort while transitioning between them. Proper placement also improves focus, as the user can easily locate windows and tools without unnecessary movement, supporting a smoother workflow.
Disorganized Desktop and Window Management
Multiple monitors can become chaotic without careful window and desktop organization. Users often leave overlapping applications or randomly position frequently used programs, which slows navigation and increases cognitive load. Workflow efficiency suffers when users must search for open windows or repeatedly resize and move applications. Implementing a systematic approach, such as keeping the primary display for active tasks and secondary monitors for reference materials, improves productivity. Tools like virtual desktops, snap functions, and taskbars tailored for multi-screen setups can further enhance organization. Proper file management and consistent placement of applications reduce friction and make it easier to work across several screens seamlessly.
Ignoring Software Optimization and Compatibility
Another mistake is neglecting software settings or failing to use programs that support multi-monitor functionality. Some applications do not automatically scale correctly across multiple displays, resulting in distorted visuals or inaccessible toolbars. Content creators working with design software may experience lag, color inconsistencies, or alignment issues if applications are not configured for multi-screen use. Ensuring that software is updated, graphics drivers are current, and monitor settings are compatible with all tools is crucial. Additionally, apps designed for creative work, like the phonto app, often offer features optimized for desktop use, but their potential is limited without properly configured hardware and settings. Taking time to optimize software ensures a smoother and more efficient workflow.
Overloading Monitors With Too Many Tasks

A frequent pitfall is attempting to multitask excessively across multiple screens. While the temptation to open numerous applications and browser tabs simultaneously is strong, overloading displays can reduce focus and slow decision-making. Users may feel productive but actually experience diminished efficiency due to constant context switching. Limiting active applications per screen and grouping related tasks helps maintain concentration and reduces mental fatigue. Establishing a workflow where one monitor handles creative or primary work while others provide supporting references, communication, or research improves task management. Clear boundaries between activities prevent distractions and ensure that multiple monitors enhance productivity rather than complicate it.
Multi-monitor setups can significantly boost productivity, but efficiency gains depend on avoiding common errors. Poor monitor placement, disorganized window management, unoptimized software, and overloading screens with tasks all undermine potential benefits. By arranging monitors ergonomically, managing desktops systematically, ensuring software compatibility, and limiting active tasks per display, users can maximize output and reduce fatigue. A thoughtful approach to multi-screen use transforms what could be a chaotic environment into a streamlined workspace, allowing professionals to complete tasks faster, maintain focus, and enjoy a smoother digital experience.…
Read More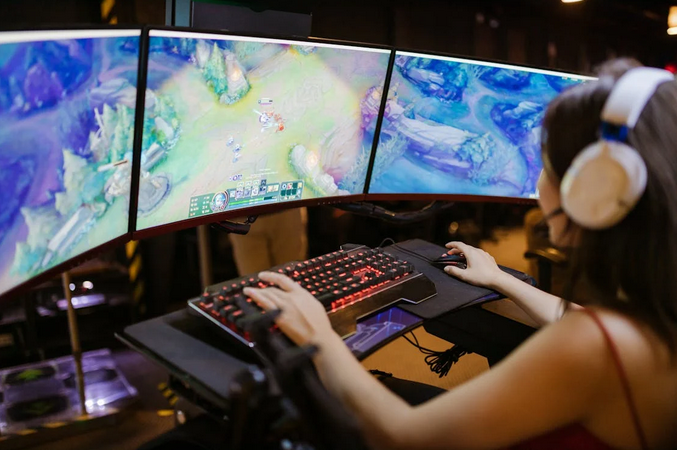


 Everyone that is into photography knows about Lightroom. It’s been one of the most popular photo editing programs for years now, and it doesn’t seem to be going anywhere. If you’re looking for a program that has everything you need to edit photos, then Lightroom is a great option. It’s also reasonably affordable, which is always a bonus.
 Adobe is like the Microsoft of the photo editing world. They have a range of programs that cater to all levels of users, from beginners to professionals. While their products can be expensive, they are worth considering if you want the best possible results. So, those are some of the best photo editing programs to use in 2022. We hope that this blog post has helped you choose the right software for your needs. If you have any questions, feel free to leave a comment below.…
 Animoto is an iPad animation
  FlipaClip, an animation maker app, can create traditional flipbook-style animations. FlipaClip is a free animation app that allows you to create animated cartoons. It combines simple but effective drawing tools with frame control to create impressive animations. FlipaClip is a powerful creative tool that can be used in classrooms. It can be used to create animation lessons and other lessons on subjects using creative methods to record and show knowledge. You can also use the app to draw with a brush, eraser, and other tools. You can create your animations with this free app. FlipaClip allows you to create animations on your iPhone quickly.
 Sometimes, consumers may find it intricate to navigate the ocean of programs included in the official store, and this is when third-party sites become an integral part. In this case, most users choose the best ones found in an easy-to-use interface. All you have to do is browse through the available classes, learn more about the specific program, see screenshots, read the description, and finally go through the program store.
  If you use an iPhone, you can be sure that you will get bombarded with fascinating applications. The software store offers audio players, movie players, movie editors, novel readers, and more to keep customers of most ages glued to their awesome gadgets. Free iPhone programs easily include publication readers that are compatible to read at .epub documents and comics. Individuals who like to read books will find these programs convenient, as they can directly download some paid or free titles from the store to start reading immediately. Similarly, comic book lovers will find interactive comic book software readers with their favorite superheroes to life. Some continuous updates and patches are available to ensure that the apps are well-planned with more new better functionality attributes.

 Zestia Quantify is the out-of-market software installer of many iOS users. It is trusted by customers because it updates its software store so frequently. If you introduce something that is overridden by iOS, you can expect Zestia Quantify to fix the problem immediately. It’s as simple as installing Zestia Quantify on your phone, opening the app store, and choosing from its large store of programs. Therefore, it is convenient to utilize this app to remove some harmful apps on your phone.
 Even though Dell has its first-rate lines, it has been entirely worthy of making phenomenal spending machines. The Dell G5 15 SE (2020) is an exceptional framework of this, advancing extraordinary AMD specs, particularly in the CPU zone, to hold down costs without compromising helpfulness. This is one of only a handful few gaming diaries that are direct and pass on phenomenal help at the expense, with a stunning screen without a doubt. Being a spending diary, a couple of repentances are done – unequivocally, its turn of events, and warming organization. In any case, for your spending plan objected, this is one of the most incredible gaming PCs available for gaming.
 While this gigantic portable has a considerable weight of 5.95Ib to fit, it is a little cost to pay for such power inside – explicitly, tenth era chips just as 64GB of memory, notwithstanding Nvidia’s most grounded RTX and Super RTX cards. There isn’t anything that this scratchpad can oversee (or kill), which makes it a perfect representation of correctly what cutting edge work area substitution could be. That is, without referencing its 1080p screen promoting an incredible 240Hz invigorate speed and its solid form. Beset up to abuse this stash, as this won’t be affordable.


 AndAppStore usually is manageable and comprehensible. It’s likely to get in the store through the AndAppStore client, which you could download by disapproving of the QRCode on the ideal. You may similarly believe it to be the
  First and foremost, it is the essential Opera, red, and dull issue. The imprint interface assists with reviewing stores of the strategy by which the imprint Facebook net application was made. All application stores don’t sell a similar application at an uncommon cost, making the other program store a drawing in venture into the commercial center to advance more rivalry. QuickOffice Connect versatile office bundle was four dollars less outrageous from the strategy of occasion than Android Marketplace on March 21st, 2011, selling for just $5.99 instead of the routine $9.99. PocketGear.com deals with the entire application stock.

 Photography is the art of compromise. It is an art form that determines what artwork and how much it might cost to get it, and the choice of equipment is no different. It is like a video game, where the kit of a certain thing amplifies certain functions while others amplify them. You have to make sure that the stuff it weakens is compensated for, or that you could do without. Photography is very similar.


 Klipsch stone speakers have been modeled to look just like actual garden stones. The speakers have been integrated into this stone-like casing itself, and also seem straight from Flintstones. The stone, similar to the enclosure, is UV resistant and extremely durable. You may drop these speakers out of 10 feet and have them working in addition to brand new. While aesthetics are not a huge consideration when you’re buying speakers, the exceptional design of those’stone’ speakers tends to turn people off entirely or turn them into instant fans. Going past the plan, should you look inside in the center of those speakers, you’ll discover a robust setup that’s more than capable of providing a fantastic audio performance, regardless of the setting. Despite their intimidating look, these speakers consider only 5.9kg.
 These durable speakers feature a UV resistant, dustproof enclosure using a rust-proof aluminum grill. The most effective one is your Klipsch AW-650 exterior speaker that provides 85 watts of constant, 340 watts of peak power and includes a 1″ titanium dome tweeter to provide high frequencies with extreme clarity. This is a really durable and highly effective speaker that produces crystal clear sound. A couple of them around the pool will probably be more than sufficient to power your outside parties.


 The way to do it is to find a software. Do you want to get it, or would you rather have a program on your phone? If you try to use it to see if it can emulate something you have learnedWays to Test Websites Using Mobile Emulator , get an emulator, or call a friend.
 Keep up to date with all the updates that are made to an emulator program. If there is a problem, it is worth updating it, or you can add support. If you have found that software updates are unreliable, you can decide to wait and try to distribute the patch. Avoid using old software for which there is no help because new software technologies are coming in that you may want to show off.


 An excellent game website will enable you to expand your customer base even further. Web design companies will find you on Google that claims to improve your game website design. It is a decision that could affect your business. What would be the situations you should consider when choosing a web design company? Let’s have a look at how important when selecting a game website designing company.
 Your website is an effort, and as it develops, you will want to promote your business by advertising the use of your website through a variety of services. Make sure that the game website design company of your choice offers all services such as internet advertising, service, hosting, domains, copywriting, graphic design solutions.…
 The dimensions of the notebook display shouldn’t be foregone. Pick among laptops that have 16:9 aspect ratio, or notebooks with good display quality. Notebooks, occasionally, can’t meet optimum system performance because of insufficient memory. Great memory size is vital for 3D gaming, graphics function, and video or picture editing, and keeps your PC run quicker.


 It starts with a simple online presence, usually consists of many HTML pages, which may include packages using scripting languages—databases as packages for this pre-installed software or other solutions such as monitoring and information assurance. Documents transferred to the host and the website can be uploaded to an online server in many ways. And the transfer is done via an FTP server. Drag and drop could upload documents to the server and use an FTP client to extend and edit them.
 The web hosting and virtual private server offering hosting is expensive and not as limited as those discussed above. There are no restrictions with the dedicated hosting you have received because the customer is an owner for himself, and you are in their requirements for the service. The server technology allows the environments to work. This environment has the qualities of any operator. Even if a server is expensive, the results are the same. Before you can create your website, you have to take care of two different things.